As the earth awakens from its winter slumber, the vibrant bounty of spring bursts forth in a symphony of colors, flavors, and fragrances. From tender strawberries to early peas and fragrant herbs, the season offers a fleeting window to capture nature’s freshest gifts. Enter the time-honored craft of canning-an art that transforms delicate harvests into vibrant preserves, ensuring that the taste of spring lingers long after the blossoms fade. In this article, we’ll explore the secrets to mastering seasonal canning, guiding you through techniques that celebrate freshness, longevity, and the joy of homemade goodness. Whether you’re a seasoned kitchen alchemist or a curious newcomer, prepare to fill your pantry with jars of sunshine and memories sealed tight.
Spring Harvest: Mastering the Art of Canning Seasonal Preserves
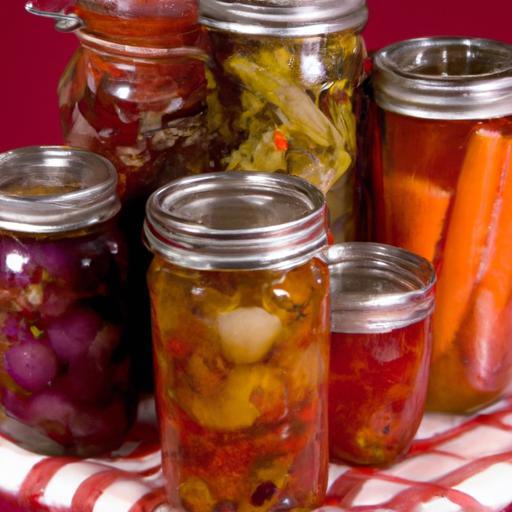
Spring harvest sits at the heart of timeless food traditions, and mastering the art of canning seasonal preserves transforms vibrant fruits and vegetables into year-round treasures. Whether you are inspired by childhood memories of grandma’s pantry or eager to embrace sustainable kitchen skills, this journey begins with selecting the freshest bounty and ends with jars brimming with flavors of the season. In this recipe post, you’ll discover everything from picking prime produce to creative recipes designed to extend spring’s vivid taste and sunshine in your home.
Prep and Cook Time
- Preparation Time: 45 minutes (cleaning, chopping, and prepping)
- Cooking Time: 30-60 minutes (depending on preserve style)
- Total Time: 1 hour 15 minutes to 1 hour 45 minutes
Yield
This recipe yields approximately 6-8 half-pint jars of preserves, perfect for gifting or savoring throughout the year.
Difficulty Level
Medium: Ideal for home cooks with basic kitchen skills and eager to explore canning; detailed instructions ensure success.
Ingredients
- 4 cups fresh seasonal fruit or vegetable, peeled and chopped (e.g., strawberries, rhubarb, green beans)
- 3 cups granulated sugar (adjust based on fruit sweetness)
- 2 tablespoons fresh lemon juice (balances sweetness and preserves color)
- 1 cup water
- Optional: 1 tsp ground cinnamon, vanilla bean, or fresh herbs like mint or basil for flavor infusion
- Non-metallic spoon or spatula for stirring
- Prepared sterile canning jars with lids and bands
Instructions
- Select the freshest produce: Choose ripe, blemish-free fruits and vegetables at their peak. Early morning harvest works best to maintain freshness and flavor.
- Prepare your jars and equipment: Sterilize jars and lids by boiling them for 10 minutes, then keep them warm until use to avoid cracking when filled with hot preserves.
- Cook the fruit base: In a large saucepan, combine chopped produce, sugar, lemon juice, and water. Bring to a boil over medium heat, stirring constantly to dissolve sugar and prevent scorching.
- Simmer to desired consistency: Reduce heat to low, simmer gently until the mixture thickens and the fruit softens, about 25-40 minutes. Use a non-metallic spoon to stir occasionally.
- Flavor enhancement: Add optional spices or herbs during the last 5 minutes of cooking to infuse subtleties in your preserves.
- Fill jars: Ladle hot preserves into the warm jars, leaving about ¼ inch headspace. Wipe rims clean to ensure a proper seal.
- Seal jars: Place sterilized lids on jars and screw on bands finger-tight. Avoid overtightening, which can prevent air escape during processing.
- Process in a boiling water bath: Submerge jars fully in boiling water (at least 1 inch above the lids) for 10-15 minutes. Adjust time based on altitude-see USDA guidance here.
- Cool and store: Remove jars carefully, place on a towel, and allow to cool undisturbed for 12-24 hours. Check that lids have sealed by pressing center; no pop means success.
- Label and enjoy: Date your jars and store them in a dark, cool place. Open one jar every week to bring spring’s essence into your kitchen.
Tips for Success
- Choose seasonal crops that hold their texture well for canning-raspberries, apricots, and snap peas are excellent choices.
- Adjust sugar levels according to your taste and the fruit’s natural sweetness without sacrificing the safety of preservation.
- Always use canning-approved jars designed to withstand heat and pressure changes.
- Maintain clean workspaces and utensils to prevent contamination and promote longer shelf life.
- Experiment with herb infusions for fresh and unique flavor profiles, like adding rosemary to strawberries or tarragon to peas.
- Pinch test your preserves on a chilled plate to check thickness; if runny, continue simmering in 5-minute intervals.
Serving Suggestions
Spring preserves shine when paired simply and elegantly. Spoon them over creamy Greek yogurt for a breakfast boost or dollop on warm buttered toast for afternoon delight. They also create spectacular glazes for roasted lamb or chicken, or swirl into cocktails for a vibrant, floral twist. Garnish with fresh mint leaves or edible flowers like violets for a visually stunning presentation.

| Nutrient | Amount per Serving (2 tbsp) |
|---|---|
| Calories | 60 |
| Protein | 0.2g |
| Carbohydrates | 15g |
| Fat | 0g |
For those eager to delve deeper into seasonal preservation, check out our in-depth guide on home canning techniques to elevate your pantry skills further.
Q&A
Q&A: Spring Harvest – Mastering the Art of Canning Seasonal Preserves
Q1: Why is spring the perfect season for canning preserves?
A: Spring is a magical time when nature bursts back to life, offering a vibrant bounty of fresh fruits and early vegetables. These seasonally fresh ingredients are at their peak flavor, making preserves more fragrant, colorful, and delicious. Plus, canning in spring allows you to capture the essence of renewal and enjoy it long after the season ends.
Q2: What are some ideal fruits and vegetables to can during spring?
A: Think tender strawberries, rhubarb with its tart punch, early cherries, apricots, and peas. Don’t overlook spring berries like gooseberries or the gentle sweetness of young carrots and asparagus. These ingredients yield preserves that shout springtime with every jar.
Q3: How do I ensure my spring harvest preserves are safe and long-lasting?
A: Safety starts with clean utensils, sterilized jars, and fresh ingredients. Use tried-and-true canning methods such as the water bath or pressure canning based on your recipe and ingredient acidity. Always follow tested recipes, especially for acidity adjustments and processing times, to keep your preserves both safe and scrumptious.
Q4: Can you share a creative tip to elevate my canned preserves?
A: Absolutely! Infuse your preserves with subtle herbs like basil with strawberries or a hint of lavender in apricot preserves. This unexpected flavor twist adds an elegant, gourmet touch that delights the palate and elevates simple jams and jellies into artisanal treasures.
Q5: What’s the best way to store and use spring-canned preserves?
A: Store your jars in a cool, dark place to maintain vibrant color and flavor. Once opened, keep them refrigerated and use within a few weeks. These preserves are fantastic on warm toast, swirled into yogurt, as toppings for desserts, or paired with cheeses for a sweet-savory delight.
Q6: How can beginners get started with spring canning?
A: Start small! Pick one or two seasonal fruits you love. Gather quality canning equipment and follow simple, trusted recipes. Don’t rush-canning is an art that blossoms with practice. Join a local workshop or online community for tips, support, and shared enthusiasm.
Q7: Why is mastering the art of canning seasonal preserves rewarding beyond the kitchen?
A: Canning connects you to nature’s rhythms, preserves fleeting spring’s gifts, and transforms harvest into homemade sustenance. It’s a creative act of patience and patience that yields delicious results, sustainable habits, and a sense of accomplishment that nurtures more than just the body-it feeds the soul.
In Conclusion
As the last jars of vibrant spring bounty settle onto your pantry shelves, you’ll find that the art of canning is more than just preservation-it’s a celebration of the season’s freshest gifts captured in time. Mastering this craft transforms humble fruits and vegetables into vibrant keepsakes that carry the essence of spring well beyond its fleeting days. With each sealed jar, you hold not only sweet and tangy flavors but also memories of sunny afternoons, hands stained with berries, and the joy of creating something truly homemade. So, this spring, embrace the rhythms of nature, sharpen your skills, and let your kitchen become a sanctuary where seasonal harvests are turned into tasty treasures to savor all year long. Happy canning!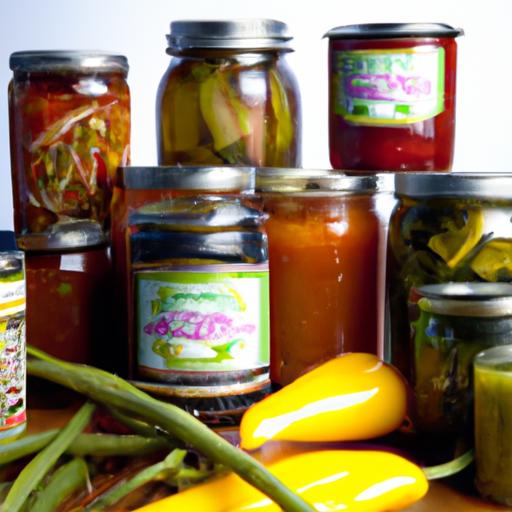


