In a world where plant-based living is more than just a trend, nut milk has quietly stolen the spotlight as a creamy, delicious, and nutritious alternative to dairy. Whether you’re skipping lactose, embracing vegan vibes, or simply craving a fresh twist on your morning smoothie, nut milk offers a versatile canvas of flavor and health benefits. But making your own? It doesn’t have to be a complicated, time-consuming ritual reserved for the kitchen pros. Welcome to “Nut Milk Made Simple: Easy Recipes to Sip and Enjoy!”-where we unlock the secrets to effortless, homemade nut milks that are as delightful to make as they are to drink. Ready to blend, strain, and savor your way to a nutty, nourishing beverage that fits perfectly into your lifestyle? Let’s dive in.
Choosing the Best Nuts for Creamy and Flavorful Milk
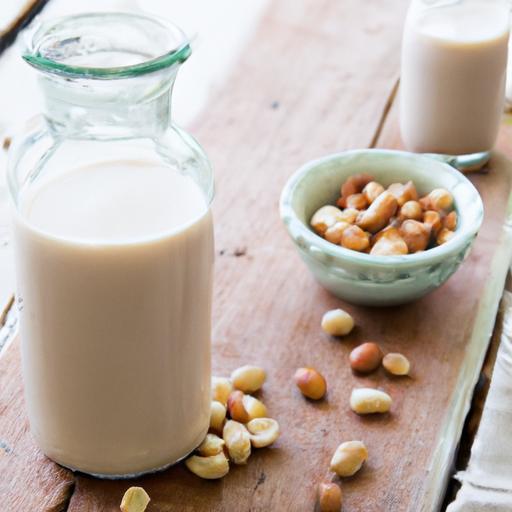
Nut Milk Made Simple: Easy Recipes to Sip and Enjoy! begins with selecting the perfect nuts, the soul of every homemade milk. Opt for fresh, raw, and unsalted nuts to craft creamy, aromatic nut milk bursting with natural flavor. Almonds are a classic choice, delivering a subtly sweet, smooth texture that’s ideal for everyday use. Cashews create an ultra-creamy, almost buttery milk, perfect for coffee or desserts. Macadamias lend a rich, luxurious profile, while hazelnuts add a warm, nutty depth that pairs beautifully with chocolate or cinnamon. Each nut variety offers a unique taste and texture, allowing you to tailor your milk exactly to your palate and recipe needs.
Step-by-Step Guide to Homemade Nut Milk Preparation
Creating creamy nut milk at home is both satisfying and straightforward. With just a few ingredients and simple tools, you’ll master this nourishing beverage.
Prep and Cook Time
- Preparation Time: 10 minutes (plus 8-12 hours soaking)
- Straining Time: 5 minutes
- Total Time: Approximately 9-13 hours
Yield
- About 4 cups (1 liter) of homemade nut milk
Difficulty Level
- Easy
Ingredients
- 1 cup raw, unsalted nuts (almonds, cashews, hazelnuts, or macadamias)
- 4 cups filtered water (for blending)
- Optional sweeteners: 1-2 tablespoons maple syrup, honey, or agave nectar
- Optional flavor enhancers: 1 teaspoon pure vanilla extract, pinch of sea salt, or a dash of cinnamon
- Nut milk bag or fine-mesh strainer for filtering
Instructions
- Soak the Nuts: Place the nuts in a bowl, cover with filtered water, and soak overnight (8-12 hours). This softens them for easier blending and removes enzyme inhibitors.
- Drain and Rinse: Drain the soaking water and rinse the nuts under cool running water to refresh and clean.
- Blend for Creaminess: Add soaked nuts and 4 cups fresh filtered water to a high-speed blender. Blend on high for 1-2 minutes until the mixture is thick and creamy.
- Enhance Flavor (Optional): Add sweeteners, vanilla extract, or spices to the blender. Pulse for another 10-15 seconds to combine.
- Strain the Milk: Pour the blended mixture through a nut milk bag or fine-mesh strainer over a large bowl. Gently squeeze out all liquid, leaving behind creamy nut pulp.
- Store and Chill: Transfer the strained nut milk to a clean glass jar or bottle. Seal tightly and refrigerate for up to 4-5 days. Shake well before each use, as natural separation will occur.
Creative Variations to Elevate Your Nut Milk Experience
Nut Milk Made Simple: Easy Recipes to Sip and Enjoy! opens the door for endless experimentation. Here are some inspired twists to try:
- Chocolate Almond Milk: Add 2 tablespoons cacao powder and a touch of maple syrup to the blender for a luscious mocha drink.
- Spiced Cashew Milk: Blend in ground cardamom, cinnamon, and a pinch of nutmeg for a cozy, aromatic twist perfect for chai lattes.
- Vanilla Hazelnut Milk: Stir in vanilla bean paste and a handful of toasted hazelnuts before blending for deep, dessert-worthy flavor.
- Macadamia Miso Milk: For a savory, umami-inspired drink, add 1 teaspoon white miso and a pinch of sea salt during blending.
Storing and Using Nut Milk for Maximum Freshness and Taste
For peak flavor and freshness, always keep your nut milk refrigerated in an airtight container. Homemade nut milk doesn’t contain preservatives, so consume it within 4-5 days. A quick shake before pouring will mix the natural separation. The leftover nut pulp is a treasure-add it to smoothies, baked goods, or granola for extra fiber and nutrients. Use your creamy nut milk in morning coffees, cereals, smoothies, or as a base for creamy soups and sauces to enhance both taste and creaminess.
| Nutrient | Per 1 cup (240 ml) |
|---|---|
| Calories | 60-120 (depending on nut choice) |
| Protein | 2-4 g |
| Carbohydrates | 1-3 g |
| Fat | 5-10 g (mostly healthy fats) |
Explore more plant-based milk options and recipes here to expand your dairy-free repertoire.
For scientific insights on nut milk nutrition and benefits, visit the National Institutes of Health Study on Nut Milk.

By mastering these steps and embracing creative twists, you are well on your way to enjoying delicious, wholesome nut milk that you crafted with love and care-perfect for every sip and every recipe.
Q&A
Q&A: Nut Milk Made Simple – Easy Recipes to Sip and Enjoy!
Q1: What is nut milk, and why is it so popular?
A1: Nut milk is a creamy, dairy-free alternative made by blending nuts with water and straining out the solids. It’s popular because it’s naturally lactose-free, vegan-friendly, and packed with nutrients depending on the nuts used. Plus, it’s incredibly versatile-perfect for drinking straight, adding to coffee, or using in recipes.
Q2: Can I make nut milk at home easily?
A2: Absolutely! Making nut milk at home is easier than you think. All you need are your favorite nuts, water, a blender, and a nut milk bag or a fine strainer. With just a few simple steps, you can create fresh, delicious nut milk tailored to your taste.
Q3: How do I soak nuts for making nut milk, and why is soaking important?
A3: Soaking nuts means letting them sit in water for several hours or overnight. This process softens the nuts, making them easier to blend and improving the milk’s creaminess. Plus, soaking can help neutralize anti-nutrients like phytic acid, allowing better nutrient absorption.
Q4: What nuts are best for making milk?
A4: Almonds, cashews, and hazelnuts are favorites for their rich, creamy texture and mild flavor. Macadamia nuts offer a buttery smoothness, while walnuts provide a deeper, earthy taste. Feel free to experiment-each nut creates a unique flavor profile!
Q5: How long does homemade nut milk last?
A5: Fresh nut milk typically lasts about 3 to 5 days in the refrigerator. Always store it in an airtight container and give it a good shake before using, as separation is natural. If it smells sour or looks curdled, it’s best to discard and make a fresh batch.
Q6: Can I customize the flavor of my nut milk?
A6: Definitely! Sweeten your milk with a hint of maple syrup, honey, or dates. Add a dash of vanilla, cinnamon, or cocoa powder for extra flair. The beauty of homemade nut milk is that you control every ingredient to match your personal palate.
Q7: Is nut milk nutritious?
A7: Yes, it can be! Nut milks are naturally rich in healthy fats, vitamins, and minerals from the nuts used. However, homemade versions don’t contain added calcium like many store-bought brands, so if you rely on nut milk for nutrients, consider fortified versions or supplement your diet accordingly.
Q8: What can I do with leftover nut pulp?
A8: Don’t toss that pulp! It’s a treasure trove for baking and cooking. Toss it into smoothies, add to oatmeal, bake into crackers or cookies, or mix into energy balls. Its fiber content makes it a nutritious and waste-free addition to your kitchen.
Q9: Are nut milks environmentally friendly?
A9: Generally, yes. Making your own nut milk reduces packaging waste and allows you to source nuts sustainably. However, keep in mind the water footprint-almonds, for example, require more water to grow than some other nuts. Choosing a variety or local nuts can help balance this.
Q10: Where should beginners start?
A10: Start with almonds or cashews! They’re easy to soak, blend smoothly, and taste great. Follow a simple recipe: soak overnight, blend with water, strain, and enjoy. Once comfortable, try adding flavors or mixing nuts for new tastes. Sip and savor the creamy goodness!
Closing Remarks
As you’ve discovered, crafting your own nut milk at home isn’t just a delightful culinary adventure-it’s a nourishing ritual that transforms simple ingredients into creamy, wholesome goodness. Whether you’re blending almonds, cashews, or walnuts, each recipe invites you to customize, experiment, and savor the natural flavors without any additives. So next time you reach for a carton in the store, remember: with a little time and these easy recipes, your perfect sip is just a blender away. Cheers to nut milk made simple, delicious, and entirely your own!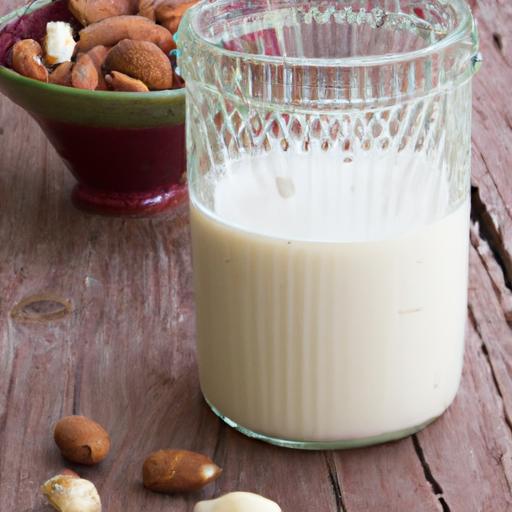


