There’s something undeniably magical about biting into a piece of buttermilk fried chicken-when the crust shatters with a satisfying crunch, revealing tender, juicy meat beneath. Achieving that crispy perfection is both an art and a science, a delicious dance between technique, timing, and the right ingredients. In this article, we’ll journey through the secrets of mastering buttermilk fried chicken, from the tangy marinade that tenderizes every bite to the golden, crackling crust that makes it unforgettable. Whether you’re a seasoned home cook or a curious beginner, prepare to elevate your fried chicken game and savor the ultimate harmony of flavor and texture.
Crispy Perfection: Mastering the Art of Buttermilk Fried Chicken
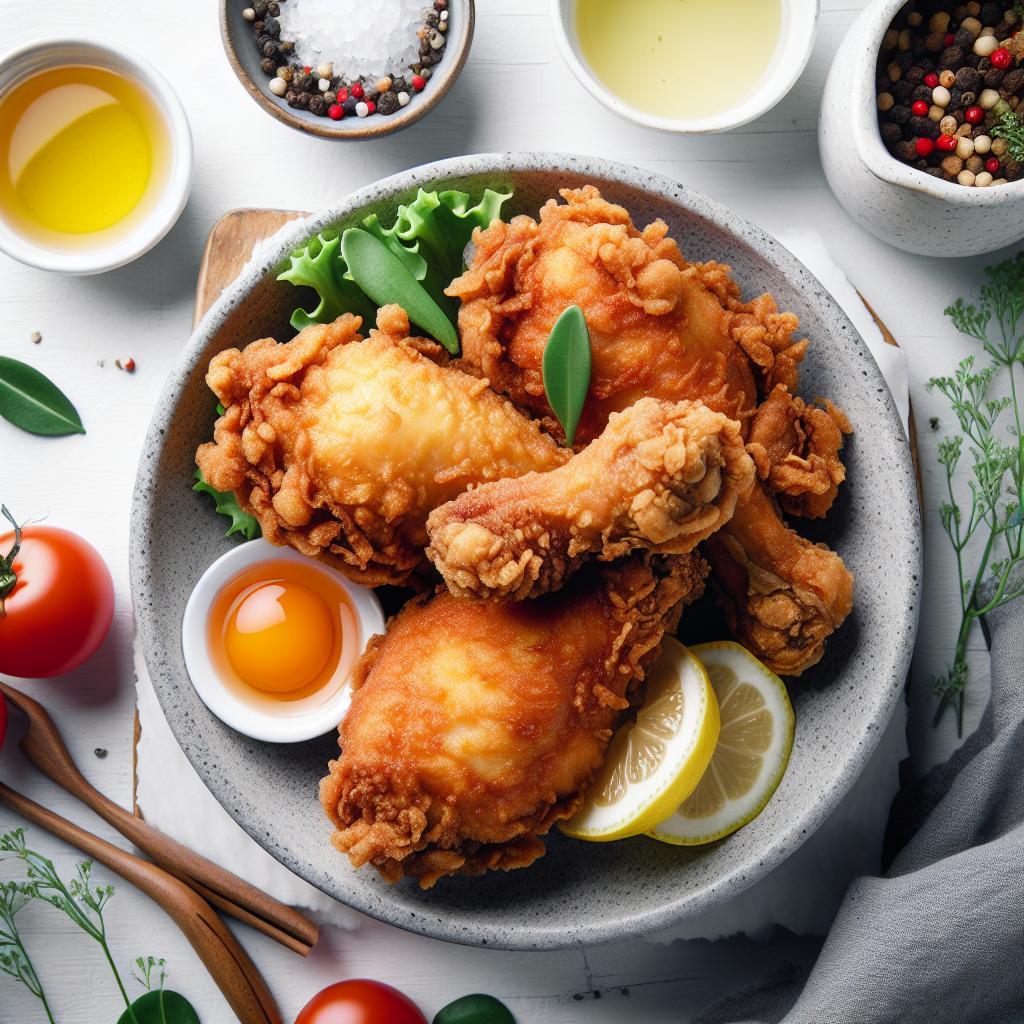
Crispy perfection begins with understanding the delicate dance between buttermilk and coating techniques, turning ordinary chicken into a symphony of crunch and juiciness that has captivated palates worldwide. This dish, steeped in Southern tradition, is more than just fried chicken-it’s an art form of layering flavors and textures, achieved through science and patience. Every bite offers an irresistible crunch followed by moist, tender meat that speaks to the magic of buttermilk’s tenderizing power combined with precise frying mastery.
Prep and Cook Time
- Preparation: 20 minutes
- Marination: 8 hours (overnight recommended)
- Cooking: 15-20 minutes
Yield
- Serves 4 to 6 people
Difficulty Level
- Medium – Requires attention to detail and temperature control
Ingredients
- Chicken: 3 pounds bone-in, skin-on chicken thighs and drumsticks
- Buttermilk Marinade: 2 cups buttermilk, 1 tablespoon kosher salt, 1 teaspoon paprika, 1 teaspoon garlic powder, 1 teaspoon onion powder, ½ teaspoon cayenne pepper (optional for heat)
- Coating: 2 cups all-purpose flour, sifted
- Seasonings for flour: 1 tablespoon salt, 2 teaspoons black pepper, 1 teaspoon smoked paprika, 1 teaspoon dried thyme
- Frying oil: 4 cups peanut oil or vegetable oil (high smoke point)
The Science Behind the Crunch: Understanding the Role of Buttermilk and Coating Techniques
Buttermilk is the unsung hero in achieving crispy perfection. Its acidity gently breaks down the proteins in the chicken, ensuring a tender interior while allowing the coating to cling tenaciously. Soaking the chicken in buttermilk overnight lets the flavors deeply penetrate and primes the surface for optimal batter adhesion.
The flour mixture, combined with seasonings, creates the crucial crust. Using a well-sifted, seasoned flour blend results in an even, crackling outer layer. The key is double dredging-first dipping the marinated chicken in flour, then back into buttermilk if you prefer extra crunch, and finishing with a final flour coating. This layering traps moisture inside while creating an irresistibly crispy shell.
Choosing the Perfect Cut: Selecting and Preparing Chicken for Maximum Juiciness
Opting for bone-in, skin-on chicken pieces elevates the juiciness quotient. The bones conduct heat slowly, preventing overcooking and locking in flavor. The skin crisps beautifully, providing that coveted crackle when fried. Pat chicken dry before marinating to ensure the buttermilk clings properly and the breading sticks without slipping off during frying.
Secrets to the Ultimate Buttermilk Marinade: Flavor Enhancers and Timing Tips
A balanced marinade is vital-too salty or too thin, and the chicken’s texture suffers. Adding spices like smoked paprika and cayenne elevates depth, while garlic and onion powders impart a subtle savory warmth. Marinate for at least 6 hours, preferably overnight, refrigerated to allow enzymes in the buttermilk to tenderize the meat fully without turning it mushy. Always use fresh buttermilk for optimal tang and consistency.
Frying Like a Pro: Temperature Control and Oil Selection for Golden Crispy Skin
Temperature precision is everything. Preheat the oil to 350°F (175°C)-hot enough to crisp crust immediately but not so hot as to burn the flour coating. Using a cooking thermometer prevents guesswork. Maintain consistent heat by frying in batches; overcrowding the pan lowers temperature and results in soggy skin. Choose oils with high smoke points such as peanut or refined vegetable oil for cleaner flavor and sustained heat.
Drain fried chicken on a wire rack to avoid steam buildup, which can soften the crunch. This simple step keeps every piece perfectly crispy as it cools slightly before serving.
Instructions
- Prepare the chicken: Rinse and pat dry the chicken pieces thoroughly. This removes excess moisture for better marinade absorption.
- Marinate: In a large bowl, whisk buttermilk with salt, paprika, garlic powder, onion powder, and cayenne. Submerge chicken pieces, cover, and refrigerate overnight.
- Season the flour: Sift the flour into a separate bowl. Mix in salt, black pepper, smoked paprika, and dried thyme for a robust coating.
- Coat the chicken: Remove chicken from marinade, allowing excess to drip off. Dredge each piece in seasoned flour, shaking off the excess. For extra crunch, dip back briefly in buttermilk and give a final flour coating.
- Heat the oil: Pour oil into a heavy-bottomed skillet or deep fryer. Heat to 350°F (175°C), using a thermometer to ensure accuracy.
- Fry in batches: Gently place chicken pieces in oil without crowding. Fry for 15-20 minutes, turning occasionally until golden brown and cooked through (internal temp 165°F/74°C).
- Drain: Transfer fried chicken onto a wire rack set over a baking sheet to drain excess oil and keep skin crisp.
- Rest and serve: Allow to rest for 5 minutes before plating to lock in juices.
Chef’s Notes
- Variations: Experiment by adding ground mustard or cayenne to the flour mix for spice lovers. For gluten-free, substitute all-purpose flour with a mix of rice flour and cornstarch.
- Make-ahead: Coat chicken and refrigerate on a baking sheet, uncovered, for up to 2 hours before frying to help dry the coating for an even crunch.
- Troubleshooting: If crust falls off, ensure chicken is patted dry before marinating and that coating is pressed firmly during dredging.
- Oil reuse: Strain and save frying oil up to two uses for better flavor development.
Serving Suggestions
This crispy buttermilk fried chicken shines when paired with classic Southern sides such as creamy coleslaw, buttery mashed potatoes, or honey-glazed cornbread. Garnish with fresh thyme sprigs or chopped parsley to add vibrant color and aroma. For an indulgent finish, drizzle a touch of hot honey over the chicken just before serving.
| Nutritional Info (per serving) | Calories | Protein | Carbs | Fat |
|---|---|---|---|---|
| Buttermilk Fried Chicken | 430 kcal | 35 g | 12 g | 25 g |

For more on classic Southern flavors and techniques, check out our guide to Southern style side dishes. For detailed oil safety and smoking points, visit American Heart Association.
Q&A
Q&A: Crispy Perfection – Mastering the Art of Buttermilk Fried Chicken
Q1: What makes buttermilk fried chicken so irresistibly crispy and flavorful?
A1: The magic lies in the buttermilk marinade. Its acidity tenderizes the chicken, breaking down proteins for juicy meat, while adding a subtle tang that deepens flavor. When combined with a seasoned flour coating and the right frying technique, it transforms the chicken into a golden, crunchy masterpiece.
Q2: How long should I marinate chicken in buttermilk for the best results?
A2: Patience is key! Marinating for at least 4 hours allows the buttermilk to tenderize the chicken thoroughly. For ultimate succulence and flavor, overnight marination (8-12 hours) is ideal. Just remember to keep it chilled to ensure food safety.
Q3: Can I use regular milk if I don’t have buttermilk on hand?
A3: Absolutely! You can create a homemade buttermilk substitute by mixing 1 cup of milk with 1 tablespoon of lemon juice or white vinegar. Let it sit for 5-10 minutes until it curdles slightly-the closer the magic of buttermilk, the better your chicken’s texture and tang.
Q4: What’s the secret to that perfectly crisp crust without it turning greasy or heavy?
A4: The secret is a balance of moisture and dryness. Shake off excess buttermilk before dredging the chicken in a seasoned flour mixture. Double dredging (dipping back into buttermilk then flour) can build layers of crispy coating. Also, frying at the right temperature (around 350°F/175°C) ensures the chicken crisps quickly without soaking up excess oil.
Q5: Which spices and herbs elevate the flavor profile of buttermilk fried chicken?
A5: Classic combos include paprika, garlic powder, onion powder, cayenne pepper for heat, salt, and black pepper. For a twist, try adding dried thyme, oregano, or even a pinch of cinnamon to your flour mix. These subtle nuances add complexity that makes each bite an adventure.
Q6: How do I know when my fried chicken is perfectly cooked inside without cutting it open?
A6: Use a meat thermometer-perfect doneness is at 165°F (74°C). If you don’t have one, check for clear juices when piercing the thickest part of the chicken. The crust should be golden brown and firm to the touch, not soft or soggy.
Q7: Is it possible to make buttermilk fried chicken healthier without sacrificing crispiness?
A7: You can bake instead of fry for a lighter dish-coat the marinated chicken with flour and a light spray of oil, then bake at high heat (425°F/220°C) to achieve a crispy exterior. Alternatively, try air frying, which uses less oil while preserving that satisfying crunch.
Q8: What sides pair best with crispy buttermilk fried chicken?
A8: The classics never fail-creamy mashed potatoes, buttery cornbread, tangy coleslaw, and sweet iced tea create the quintessential Southern feast. For a modern twist, try roasted vegetables, spicy pickles, or a fresh cucumber salad to cut through the richness.
Q9: Can I prep buttermilk fried chicken ahead of time?
A9: Yes! Marinate the chicken the night before and keep it refrigerated. You can also dredge and bread it, then store it in the fridge uncovered on a wire rack for an hour before frying-this helps the coating set and the crust crisp even more.
Q10: What’s a common mistake to avoid when making buttermilk fried chicken?
A10: The biggest pitfall is overcrowding the pan during frying. This drops the oil temperature, leading to greasy, soggy chicken. Fry in small batches, maintaining a steady temperature, and use a wire rack to drain excess oil after frying.
Master these tips, and you’ll be serving up crispy, juicy buttermilk fried chicken that’s nothing short of perfection-a true crowd-pleaser every time!
Final Thoughts
As the last golden, crispy bite melts away, you’ll realize that mastering the art of buttermilk fried chicken is more than just a recipe-it’s a dedication to flavor, texture, and tradition. With every tender, juicy piece enveloped in that perfectly seasoned, crunchy crust, you’ve embraced a culinary craft that transforms humble ingredients into a feast of crispy perfection. So go ahead, roll up your sleeves, trust the buttermilk’s magic, and let each batch remind you why this Southern classic remains an evergreen favorite on tables around the world. Your journey to fried chicken mastery is only just beginning-and it tastes absolutely irresistible.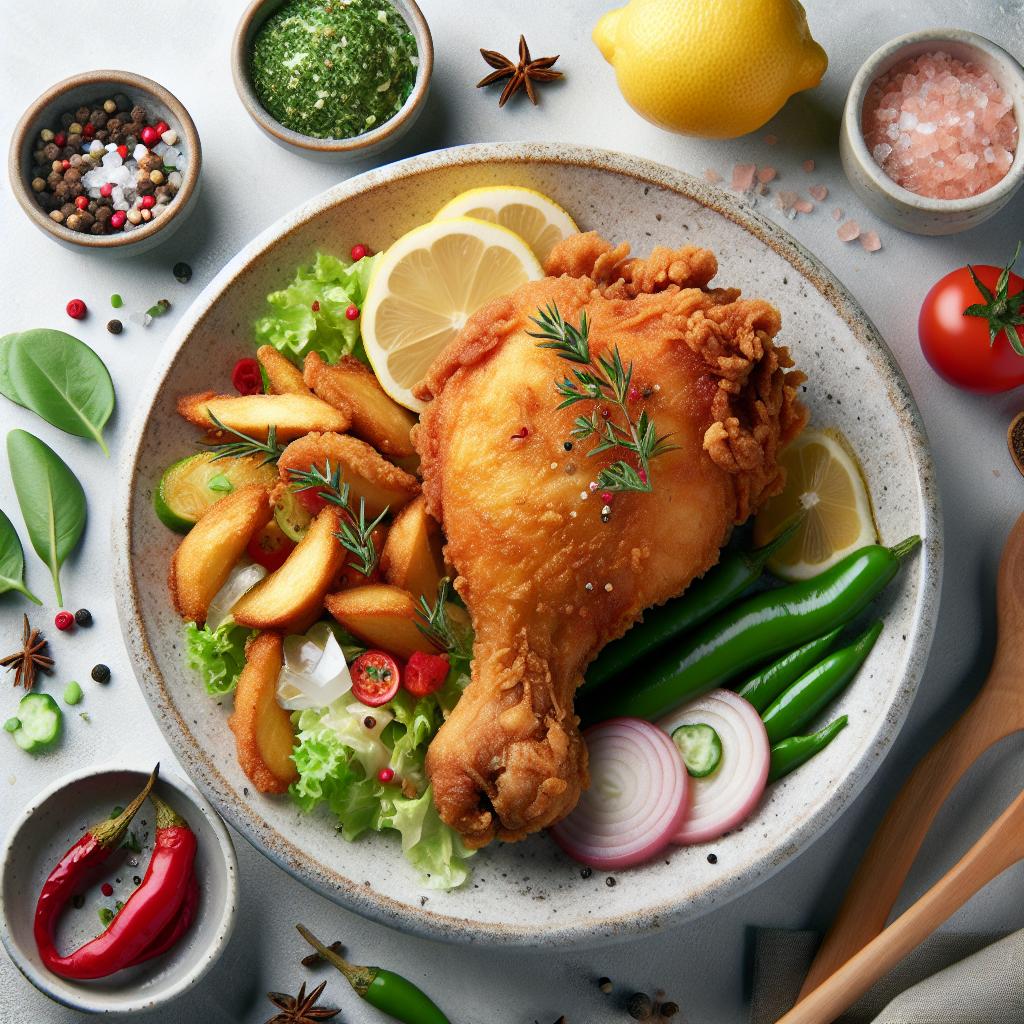


