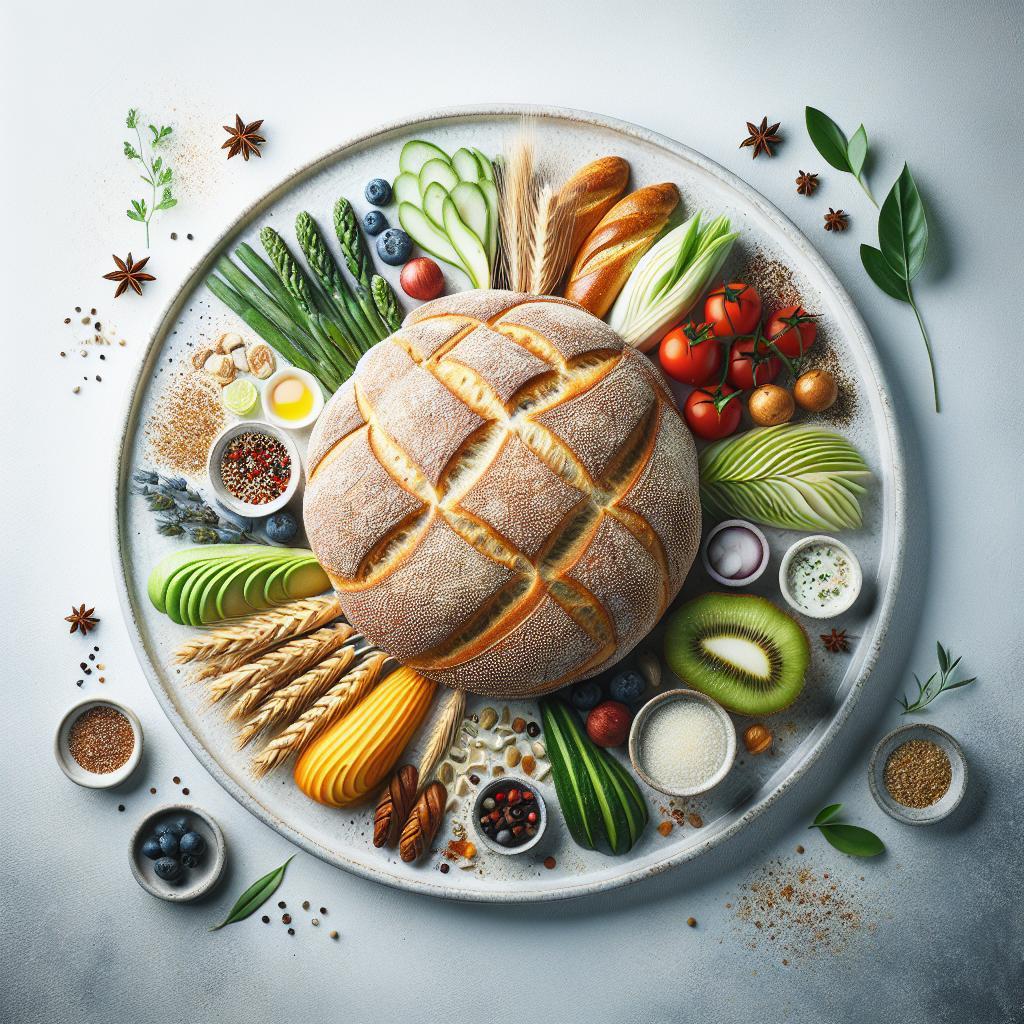
In the world of artisanal baking, bread is no longer just a humble staple-it has transformed into an expressive canvas where craftsmanship and creativity intertwater. Welcome to the captivating realm of plate arranged bread, where loaves are meticulously shaped and artfully presented to delight both the eye and the palate. This article explores the intricate techniques and inspired designs that elevate ordinary bread into stunning, edible masterpieces. Whether you’re a seasoned baker or an enthusiastic novice, mastering plate arranged bread opens a doorway to a new dimension of culinary artistry, turning every loaf into a statement of skill and imagination.
Mastering Dough Texture and Flavor for Visual Appeal
Mastering Plate Arranged Bread: Artful Loaves on Display begins with understanding how to coax the ideal texture and flavor from your dough-an essential foundation for crafting visually stunning bread worthy of any culinary tableau. Achieving that perfect crumb, crust, and aroma enhances not only taste but the visual intrigue that sets artisanal loaves apart.
Prep and Cook Time
- Preparation: 25 minutes (plus 1.5-2 hours for fermentation and proofing)
- Baking: 30-35 minutes
- Total Time: Approximately 2.5-3 hours
Yield
1 large loaf, or 12 generous slices
Difficulty Level
Medium – Best suited for those with basic baking skills looking to elevate bread baking mastery.
Ingredients
- 3 ½ cups bread flour, sifted
- 1 ¼ cups warm water (105-110°F)
- 2 tsp active dry yeast
- 2 tsp sea salt, finely ground
- 1 tbsp honey or natural maple syrup (for gentle sweetness and enhanced browning)
- 2 tbsp olive oil (for tenderness and glossy crust)
- Optional: 2 tbsp mixed seeds (sunflower, flax, sesame) for texture and visual contrast
Instructions
- Activate the yeast: In a small bowl, dissolve the yeast and honey in warm water. Let it sit for 5-7 minutes until it becomes foamy, indicating the yeast is active.
- Combine dry ingredients: In a large mixing bowl, whisk together the bread flour and sea salt evenly to distribute the salt thoroughly.
- Mix the dough: Pour the yeast mixture and olive oil into the flour. Stir gently with a wooden spoon until a shaggy dough forms.
- Knead for texture: Turn the dough onto a lightly floured surface. Knead for 8-10 minutes, pressing and folding until the dough becomes smooth, elastic, and slightly tacky. Add a sprinkle of flour if too sticky, but avoid over-flouring.
- First rise: Place dough in a lightly oiled bowl, cover with a damp kitchen towel or plastic wrap. Let it rise in a warm, draft-free area for about 90 minutes, or until doubled in size.
- Shape the loaf: Turn the dough out and gently deflate it. Shape into an oval or round boule. For added artistry, tuck the dough edges underneath to create surface tension.
- Score for an artful display: Transfer the shaped loaf onto a parchment-lined baking tray or preheated baking stone. Using a sharp blade or lame, make deliberate scoring patterns-classic crosses, leaf motifs, or geometric slashes-to allow controlled expansion and add visual flair.
- Second rise: Cover again lightly and let rest for 30-45 minutes until slightly puffed.
- Bake with steam: Preheat the oven to 450°F (230°C). Place an oven-safe dish with water at the bottom to create steam, enhancing crust development. Bake the loaf for 10 minutes, then reduce the temperature to 400°F (205°C) and bake for another 20-25 minutes until deep golden and crisp.
- Cool with care: Remove from oven and transfer to a wire rack. Allow the bread to cool fully before slicing to preserve crumb structure and prevent gummy texture.
Chef’s Notes
- Flour varieties: Try substituting up to ½ cup with whole wheat or rye flour for earthier flavor and intriguing crumb patterns.
- Flavor boosters: Incorporate fresh herbs like rosemary or thyme into the dough for an aromatic twist that complements presentation.
- Adjust hydration: Wetter doughs yield an open crumb which looks stunning when sliced and presented but can be trickier to handle-practice folding technique to improve dough strength.
- Pro tip: Use a spray bottle to mist the loaf mid-bake if steam is lacking, helping to maintain crackling crust with glossy sheen.
- Make ahead: Dough can be refrigerated after the first rise for up to 24 hours, slowly fermenting flavor and making planning easier.
Serving Suggestions
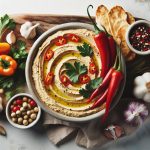
To truly elevate your plate arranged bread presentation, slice the loaf into thick rustic wedges or thin even slices that showcase the crumb’s network of bubbles. Layer slices gracefully on a wooden board with sprigs of fresh herbs, small bowls of infused olive oil, and colorful spreads like roasted garlic hummus or whipped whipped herb butter. Add textural diversity with toast points, seeded crackers, or a few heirloom cherry tomatoes for bursts of vibrant color.
For photo or event display, alternate slices standing upright with whole mini loaves to create height variation. Dust the edges lightly with flour for a painterly effect. Small edible flowers, sea salt flakes, or cracked black pepper atop the scored crust can turn simple artful loaves into miniature masterpieces.
| Nutrition (per slice) | Calories | Protein | Carbohydrates | Fat |
|---|---|---|---|---|
| Rustic Bread | 140 kcal | 5 g | 28 g | 2 g |
Discover more artisanal baking tips and creative plating ideas in our artful bread decorating guide. For an expert deep dive on yeast characteristics and dough science, visit King Arthur Baking’s yeast guide.

Q&A
Q&A: Mastering Plate Arranged Bread: Artful Loaves on Display
Q1: What exactly is plate arranged bread?
A1: Plate arranged bread transforms humble loaves into captivating visual centerpieces. It’s the art of presenting various bread types-sliced or sculpted-arranged thoughtfully on platters to create a feast for the eyes as much as the palate. This technique elevates everyday bread into an edible work of art.
Q2: Why should bakers and hosts care about plate arrangement for bread?
A2: Bread is often the overlooked star of any meal. By mastering plate arrangement, bakers and hosts can celebrate bread’s textures, shapes, and colors, making it an inviting experience. It encourages guests to appreciate diversity-from crusty artisan rounds to soft brioche slices-and sparks conversation around the table.
Q3: What are some essential breads to include for a stunning plate arrangement?
A3: Variety is key! Combine rustic sourdough with its open crumb, the golden sheen of challah, slender baguette slices for height, and hearty multigrain rounds for texture. Including breads with seeds, herbs, or swirls of olive oil adds both visual interest and flavor complexity.
Q4: How can one achieve harmony and balance when arranging bread on a plate?
A4: Think like a painter: balance shapes, colors, and sizes across the platter. Place tall baguette slices upright, nestle rounded loaves off-center, and fan out thin slices in gentle curves or rays. Incorporate small bowls of complementary dips, like whipped butter or herbed olive oil, to add dimension and anchor the display.
Q5: Are there simple techniques to make bread look more inviting on display?
A5: Absolutely! Lightly toasting some slices brings out golden hues and crisp texture, while brushing a touch of olive oil over crusts enhances their shine. Use small sprigs of fresh herbs-like rosemary or thyme-to add flashes of green and a natural aroma. Play with overlap and layering to create depth and invite touch.
Q6: Can plate arranged bread fit into themed dining experiences?
A6: Definitely! The beauty of plate arranged bread is its adaptability. For a Mediterranean-inspired table, showcase olive focaccia beside sun-dried tomato rounds and za’atar flatbreads. For a rustic farmhouse feast, include hearty rye and oat loaves paired with creamy cheeses and nuts. The visual cues set the tone before the first bite.
Q7: What mistakes should be avoided when plating bread?
A7: Avoid crowding the plate to the point where individual breads lose their identity. Equally, don’t neglect contrasting textures-too many similar breads can feel monotonous. And remember, stale bread is a no-go; freshness is key to both flavor and appearance.
Q8: How can beginners start practicing this art at home?
A8: Start with just two or three bread varieties from your local bakery. Experiment with simple arrangements-stack slices at varying angles or create a small fan-to get comfortable with spatial design. Add a small bowl of butter or dip as a centerpiece to tie everything together. With each attempt, your confidence and creativity will rise like perfect dough.
Q9: How does mastering plate arranged bread enhance the overall dining experience?
A9: It turns bread from a utilitarian staple into an engaging prelude to the meal. Thoughtful presentation teases the senses, invites sharing, and honors the craft of baking. In essence, it transforms a simple loaf into a celebration-where art meets appetite.
Embrace the artful loaf; invite your guests to see bread not just as food, but as edible inspiration!
In Summary
As the final crumb settles and the last slice finds its place, mastering plate arranged bread reveals itself as more than just a culinary skill-it is an art form that transforms humble loaves into captivating centerpieces. With each carefully crafted arrangement, you invite both eyes and palates to experience the timeless beauty of bread, elevating it from simple sustenance to a statement of creativity and care. Whether for a casual gathering or an elegant affair, these artful loaves on display remind us that food is as much about presentation as it is about flavor. So, let your imagination rise alongside your dough, and turn every plate into a canvas where bread tells its delicious story.


